Thursday, November 29, 2012

Happy Holidays!

I feel like I'm very prepared this year....holiday cards went out on Monday!  Last year, I procrastinated so much that we were lucky to get a "Happy New Year" card out!  I also cut my card costs in half by designing the cards myself and by uploading the pics and having them shipped to me.  I would have thought picking them up in the store would have been cheaper.  Who knew?!?!?

Thanks to RTC PhotoWork for the awesome family pictures!  Happy Holidays!

Sprinkled with Love


I'm co-hosting a baby "sprinkle" in a couple of weeks.  A "sprinkle" is like a baby shower, but are usually held in honor of the mom-to-be's second baby.  Our theme is "Sprinkled with Love".  We still have lots to plan, but, so far, an ice cream bar and sugar cookies are on the menu!  Here's a picture of the food labels.


 Stay tuned for pictures and more!

Silent Auction

My sister is a fantastic fourth grade teacher that is devoted to her students and school.  Every year, her school has a silent auction and, each year, my sister makes a donation.  The students and their parents can bid on the auction items and raise money for their school.  This year, she decided to donate two excursions.  She asked me to make two certificates - one for mani/pedis and one for a cooking class.  I would have loved to have seen the bid sheets for these items!

Ready to Pop Baby Shower

I LOVED making these goodies for this Ready to Pop themed baby shower!

Pregnancy Announcement

Invitation

Barrette and Headband Making Station Instructions


One of the food labels.  All of the foods "popped"!

Wishing Tree Instructions

Wishing Tree Tags

Coordinating Thank You Cards 

Holiday Party Invite

Loved making this holiday party invite :)

Tuesday, November 6, 2012

"Gobble til ya Wobble!"

 I was checking out Pinterest during my daily allotted visit (I have to limit myself to just once ;) and came across these adorable wooden blocks and thought I have to make them! 

My hubby had some scrap wood from another project laying round in the garage carefully organized in his workspace.  I showed him the pin and he cut the wood down to blocks that wood fit into a space on top of our t.v. armoire.  While my boys were napping, I used my acrylic paint dauber to paint the top and sides as well as about 1/2 inch border on the front of the block.  While that dried, I cut out my scrapbook paper.  I used scraps of paper from other projects.  To attach the scrapbook paper, I applied a strip of adhesive from my Tombow tape runner so that I could readjust the paper if I needed to.  Then, I used a foam brush to apply Mod Podge under and over the paper.  I allowed that to dry for about 15 minutes.  While I waited, I used my Calligraphy cartridge to cut the letters out.  I love this cartridge.  There are so many font options.  I cut "Gobble" out with one and "til ya wobble" out with another.  To attach the letters, I lightly brushed a layer of Mod Podge on, applied the letter and then applied another light coat of Mod Podge to the entire front side of the block.

Here are a couple of pics:


 ...and a closer shot.

My hubby was so impressed with how quickly and easily we re-purposed these scraps of wood!

Coming soon....baby shower and baby sprinkle invites and party supplies :)

Saturday, October 27, 2012

Happy Fall Y'all!

I love Autumn!  It finally began to feel like Autumn in Texas yesterday.  It just doesn't seem right to be setting out pumpkins, jack-o-lanterns, and other Halloween decor, so I'm really enjoying this cold front :)

October has really flown by!  For me, it has been filled with a lot of projects and events.  I thought I'd highlight a couple of them.

First, I hosted a craft night for my MoMs group.  I scoured Pinterest for something that we could do pretty easily and inexpensively.  I found a pin for "family name pumpkins".  I loved the idea, but none of them were exactly what I wanted.

This project was really easy and were made for less than $15.  The pumpkin was the most expensive part because we used the carveable pumpkins.  Normally, the pumpkins cost about $30 at my local craft store, but with coupons and sales I got them for about $11 per pumpkin.  You can get a real pumpkin of similar size for less than $3 at Walmart, but we wanted to be able to use them through Thanksgiving and for Halloweens and Thanksgivings to come.

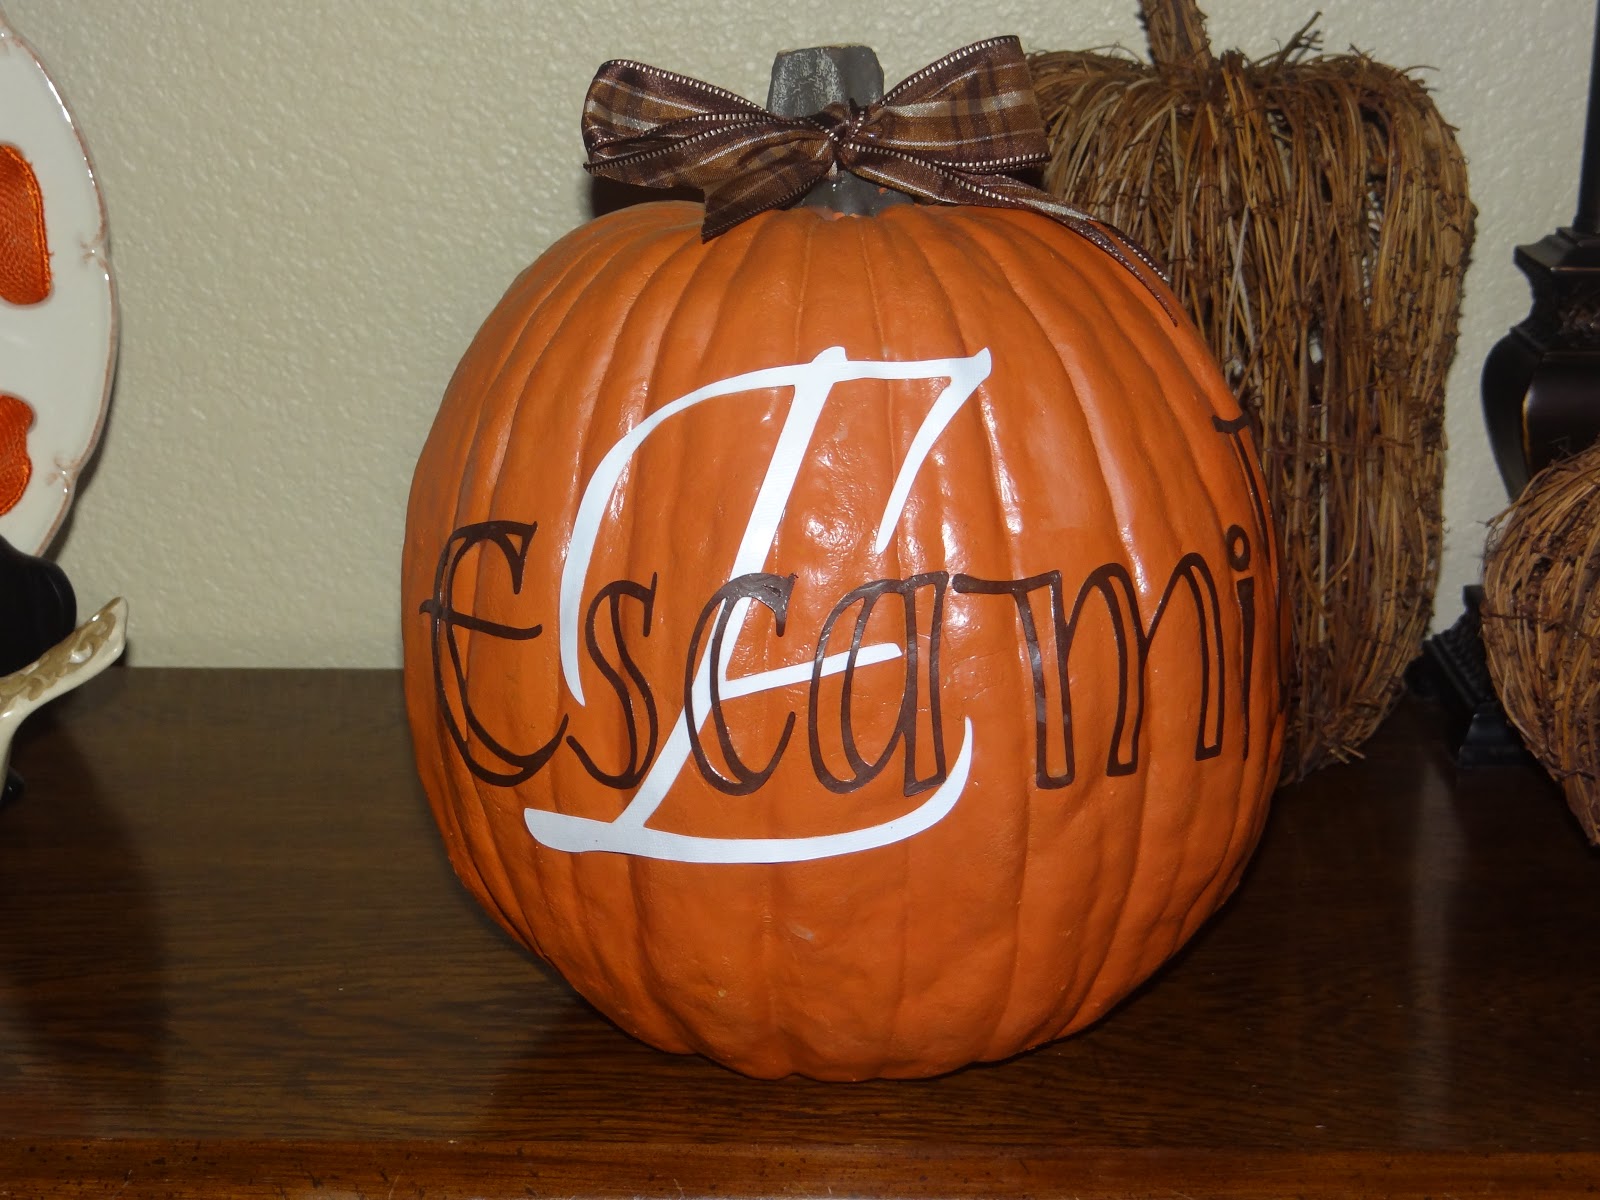
Here's a picture of one that I made for a friend that couldn't attend.

To make them, you need a pumpkin, scrapbook paper, mod podge, a foam brush and ribbon or fabric.  You can use any color or patterned scrapbooking paper, but we chose brown and white since we were planning on displaying the pumpkins through Thanksgiving.  I cut the letters out using my cricut (and two different font cartridges) and "mod podged the heck out of it" (a little joke from my MoMs).    We then tied bows using ribbon.  This pumpkin is shown with a bow made from fabric scraps from a wreath highlighted in another post.


 Another project that has been occupying my time is wreath making!  After I posted my wreath tutorial a couple of weeks ago, I've had so many requests for wreaths.  I'm glad I stocked up on straw wreaths ;)  My two year old boys have some friends that just recently moved, so I decided to make them a wreath as a housewarming gift.  The boys were so excited to pick out the supplies at the craft store.  I used the same fabric from the wreath tutorial, so all we needed to get was a wreath form and numbers.   To make the numbers look a little more "rustic", I painted them white and then inked the edges using chalk for scrapbooking.  I think it came out really cute and can't wait to share it with our friends!

Saturday, September 29, 2012

Fall Wreath Tutorial

 Today was a really rainy day.  We ran a few errands in the morning and then came home for lunch.  While the boys were napping I ran to the craft store and got a couple of supplies to work on my fall wreath.  This wreath was so easy to make.  It really took me longer to decide on what fabric to use than to put it together.

  At first, I had chosen a black and white patterned fabric, but when I saw this orange fabric, I knew it was the one!  I also chose some purple, green and brown fabrics and burlap to coordinate.  I purchased two ribbons for other projects, but used the orange burlap-y ribbon for some of the flowers.


  First I took my fabric and laid it out to cut strips.  The strips were probably about 2 - 3 inches wide.
 Next, I wrapped the strips around the wreath form.  I overlapped the ends, but you could hot glue or pin them to secure them to the wreath.  I chose to use a straw wreath (because it was on sale at Walmart ;).  Whenever I use straw wreaths, I always leave the plastic wrap on.  It seems to make putting the fabric or yarn on easier.
 Here's a picture of my wreath completely wrapped in fabric.
 Next, the fun part: flower making!  Really you could make any type of flowers using these fabrics.  Right now, my skills include making what I call a "rosette".  Basically, you cut a strip of fabric, fold it in half and tightly wind it around itself.  Then you can secure it with a pin or hot glue and attach it to the wreath.  I got hot glue happy!  These flowers are never coming off :)
 AND voila! my wreath is complete!


Tuesday, September 25, 2012

Another Pinterest Project

A friend of mine was turning the Big 3-0 recently, so I thought I'd make her this little gift that I saw on Pinterest.  I don't know what it is about turning 30, but it really does SUCK!!  Hopefully, this gift made it suck just a little less ;)

 This was so easy and inexpensive to make!  The most expensive thing was the lollipops! 

First, I used a small gift box that I found at the dollar spot at Target.  I LOVE the dollar spot!!!!!  I cut some florist's foam that I had leftover from another project to fit the bottom of the gift box.  Then, I stuck the sticks of the lollipops in the foam.  I used the entire bag of  Blowpops.  You could use any type of lollipop, but Blowpops are my fave :) I  wrapped some tissue paper around and in between the lollipops because I could see the green foam when I looked into the box.  You could use shredded paper or confetti to cover the foam, too.  Lastly, I typed and printed the words "Happy Birthday!" and "30 Sucks!" out on my laptop and cut them out.  I attached the "30 Sucks!" on to a leftover Wilton lollipop stick and VOILA! the gift was complete!

Personalized Stools for Kiddos

I was so excited when I was asked to make a stool to coordinate with a set of closet dividers that I had made for a family friend from New Jersey.  I really enjoyed making it!  


Here's a link to the closet dividers on my Facebook page:
https://www.facebook.com/photo.php?fbid=432283063467654&set=pb.144451285584168.-2207520000.1348619125&type=1&theater


Jungle Invites

I had so much fun designing these jungle invites, favor tags and coordinating thank you cards.  


 I just love the adorable little elephants!


 "A wild thank you for you" favor tags


She's About to POP!

Here's a sneak preview of my "She's about to POP" baby shower invites & more!!!!! Just a couple of favor tags that say "Thanks for popping in!"!!

Sunday, August 26, 2012

Green & Blue Bridal Shower


Love the colors for this green and blue bridal shower!  I had so much fun designing this invite and coordinating shower necessities.

 Invitation


Coordinating Food Tags


Design by Peachy Keen Design