Sunday, December 18, 2011

Loop Wreath


I've been meaning to make this wreath since last year, so I'm glad I finally got it done!  I saw it in an idea book called  Simply Handmade from December/January 2010. 

The first thing I did was purchase a 12 inch foam wreath from a craft store.  I painted it a dark evergreen color.  In hindsight, I probably could have skipped this step because you don't see any part of the foam wreath once you've applied the paper loops.
While the paint was drying, I took my two-sided scrapbook paper and cut 100 1x6 strips.

This pictures shows the two different sides.  I chose Christmas-themed paper.
After cutting the strips, I inked the edges of my paper using a CTMH ink pad.  I chose to ink using a green ink pad, but I think brown or even a red would have looked just as good.

When the paint had finally dried, I added ribbon looped and tied in to a bow for hanging.  I also used hot glue to hold it in place.
Finally, I could start making loops with my strips.  I pinned them in place with straight pins.  I found that it worked easier if I pushed the pin through the loop and the wreath at the same time rather than pushing it through the paper first and then the wreath.  I also had to use a thimble after a while because my finger got a little sore.
Start pinning the loops in the inside part of the wreath first.  Alternate colors and patterns.

Pretty!

Wednesday, December 14, 2011

Our New Nest

One of my favorite people and her family moved.  She asked me to make some announcements to send out to friends and family with their new address. 
I had some leftover paper from my sister's baby shower save-the-dates that I wanted to use.  I absolutely love the colors - purple, green, and blue.  I think the design and colors are pretty gender neutral, so I thought they would be good for a family announcement.  The wording is pretty simple.  At the top of the announcement it says "our new nest", the family's name, and their address.  I stamped two different sized birds and colored them in using Prisma colors.  I also made some really cute envelope seals using the same fun paper that I cut into squares and ran through my Xyron machine.

I must have birds on the brain!  For my grandfather's birthday I made him a card.  He really got a kick out of the card I sent him last year, so I tried to make another card that he would enjoy.
Happy "Bird" day!  I couldn't engineer this card correctly when making the birdhouse.  I tried several times using cardstock and couldn't make it happen, so I decided to color the house using Prisma colors.

I used a CTMH stamp for this tag, handwrote the sentiment, and colored it using Prismas.

Love my birds!  I stamped and colored this little guy.

Owl Themed Baby Shower

 The past few months have been incredibly busy for our family!  From weddings to holidays to birthdays to baby showers, I think we have covered every possible occasion!  Probably the most special to me, was my youngest sister's baby shower.  This is her first baby and we are so excited for our boys to have a new cousin.  When my middle sister and I decided to host the shower we wanted to make sure everyone had plenty of notice, so we sent out save the dates.  We didn't have anything planned except for a date and a theme!

I'm not really sure where the idea of the owl theme came from, but it is reflected in a lot of different aspects.  For the invitation, we used different papers to create a patchwork owl.
The mommy-to-be is very unique and artistic, so instead of having a  guest book for everyone to sign, we thought it would be a nice touch for everyone to write a personal message and hang it from a "wishing tree".  The branch was actually used for a family friend's baby shower.  They had taken the branch from a tree in their yard and spray painted it white.  It was perfect for our wishing tree.


I used the same papers we had used in the patchwork owl for the wishing cards.  Here's a close up of the cards.
We also used the owl theme in our favors.  We put individual servings of hot cocoa and marshmallows in baby food jars (of course).  I created little "labels" for the jar using the same coordinating papers that we used to make the owls for the invitations and for the wishing tree cards.


I attached these "labels" to the baby food jars by turning them into stickers.  I used my Xyron machine to add the adhesive backing.  I put the squares through the Xyron before I attached the stamped circles.  After I ran them through the Xyron, I used three dimensional foam squares to attached the circles.  I also colored the word "Girl" and the heart in using a Prisma Color pencil.
I hardly ever use my Cricut, but I did use it to cut out the letters for the banner on the fireplace.  
I used two different font cartridges for each word.
Here are some more pictures from the shower.
We created a hot cocoa bar with four different types of marshmallows.  I think I went a little crazy with the marshmallows, but I never knew you could buy peppermint, mint chocolate chip, and pumpkin spice marshmallows!  We placed the marshmallows in stemless wine glasses and adhered leftover "labels" from the favors to the front of the glasses.  The spoons were dipped in white chocolate.  Yummy!
The kitchen table was a snack "station".  Here we had owl cookies and water with strawberries.  The china we used was white and gold so we placed a gold charger underneath the water container to collect any water dribbles.  We kept the decorating pretty simple.  I hung a banner made with scraps of paper that I cut in to squares and attached using different colored ribbon.  We displayed a photograph of the mommy and daddy-to-be when they were babies and a vase of flowers.  I wrapped a white and gold ribbon around the vase to dress it up a little bit.

Here's a close up of the owl cookies.  I got the idea for these cookies when I was looking at Wilton's website for dinosaur cake pans for a different event.  Their owl cookies were decorated for Halloween.  I used two oval shaped fondant cutters to create the head and body and icing that I tinted in different shades of violet.  I had some difficulty with thinning my icing, so these cookies were more difficult than they should have been.  They were so yummy!  I think the key is almond extract. 


My sister definitely had a vision in mind when she decorated her daughter's nursery.  She had what we called her "inspiration nursery".


She asked me to paint some artwork inspired by paintings she saw at PierOne.

Can't wait to meet her!

Tuesday, September 13, 2011

Black, White, & Purple: Bridal and Baby Shower

One of my sister's friends recently contacted me about making some bridal shower invites for one of her good friends.  She gave me a couple of ideas of what she and the bride were looking for. The bride's favorite color is purple, so this is what I came up with.  The ribbon slides off for easy access to the invitation.  I used paper that I purchased from Hobby Lobby (Paper Tray, I think) and ribbon and jump rings to attach the monogram from Michaels.


I also made some thank you cards to give to the bride-to-be as a gift.
I used the same papers as the invitation.  I stamped the "R" to create a monogram for the bride's first name, Rachael.

I am so excited about this upcoming baby shower.  My sister and her husband are expecting a little girl at the end of January.   I can't wait to start planning her shower!  I've already made save-the-dates (for a baby shower, I know.....).  Becky's nursery colors include purple, white, pink, and her "inspiration nursery" includes framed bird illustrations.  I'll share more about her shower once I create the invitations.

Think Pink: A Very Pink and Polka Dotted Baby Shower!

I was so excited for my sister-in-law's shower.  Not only is she expecting another sweet baby girl, but I was excited to try out a few new things.  Firstly, I got to use a new stamp set that I purchased from Stampin' Up and, secondly, I tried my hand at decorating cookies.

My co-host (and sister-in-law) and I decided on a polka dot theme to kind of coordinate with the nursery theme and bedding which includes many patterns.  Once we decided on theme, location, etc. I got to work on the invites.  Here's what I created:
I found instructions online on how to cut and fold the paper in to a diaper like shape.  I purchased the papers at JoAnn's and ordered the diaper pins from Amazon.com.  I used a stamp from CTMH for the monogram.

I recently went on a scrapbooking  retreat and was excited to be introduced to Stampin' Up.  I had seen a card on a blog (that I stalk) that had used the following stamp sets.  What I like about these stamps is that each piece is individual, so if I only wanted to stamp the baby carriage, I could.  I enjoyed adding the baby and booties, etc.


I also got the idea for the baby booties from the Stampin' Up catalog.  That catalog not only has great products, but ideas as well.  Stacy, the SU rep and owner of the retreat, helped me find a template for the booties.


For my next project, I had to channel my Grammy and her baking skills.  Both of my grandmothers were incredibly talented bakers among other things.  When my Grammy passed away, I "inherited" her collection of piping tips, baking pans, Wilton idea books, and more.  After my success with my boys' birthday cake, I decided to make cookies as favors for  my sister-in-law's shower.  When I purchased the cake pan for M&B's birthday, I also purchased a set of baby cookie cutters that included a onesie cutter, bear, rocking horse, and carriage.  I decided to only use the onesie cutter for the shower.  Maybe next time, I'll be more adventurous ;) and use the others.  I did so much research on how to decorate the cookies, what type of icing to use, how to "flood" the cookies, etc.  When I told one of my friends that I had watched a couple of youtube videos on how to "flood" the cookies, she just laughed at me.  I think it worked!
I baked about four dozen cookies.

Then I "flooded" them by using thinned icing and a "color flow" mixture that I purchased from Wilton.

 It is very important to let the icing dry completely otherwise when you go to pipe the designs on them, they smudge or crack.  I let mine dry for at least 24 hours before I piped the decorations on.


For my first attempt at decorating cookies, I think it was a success!

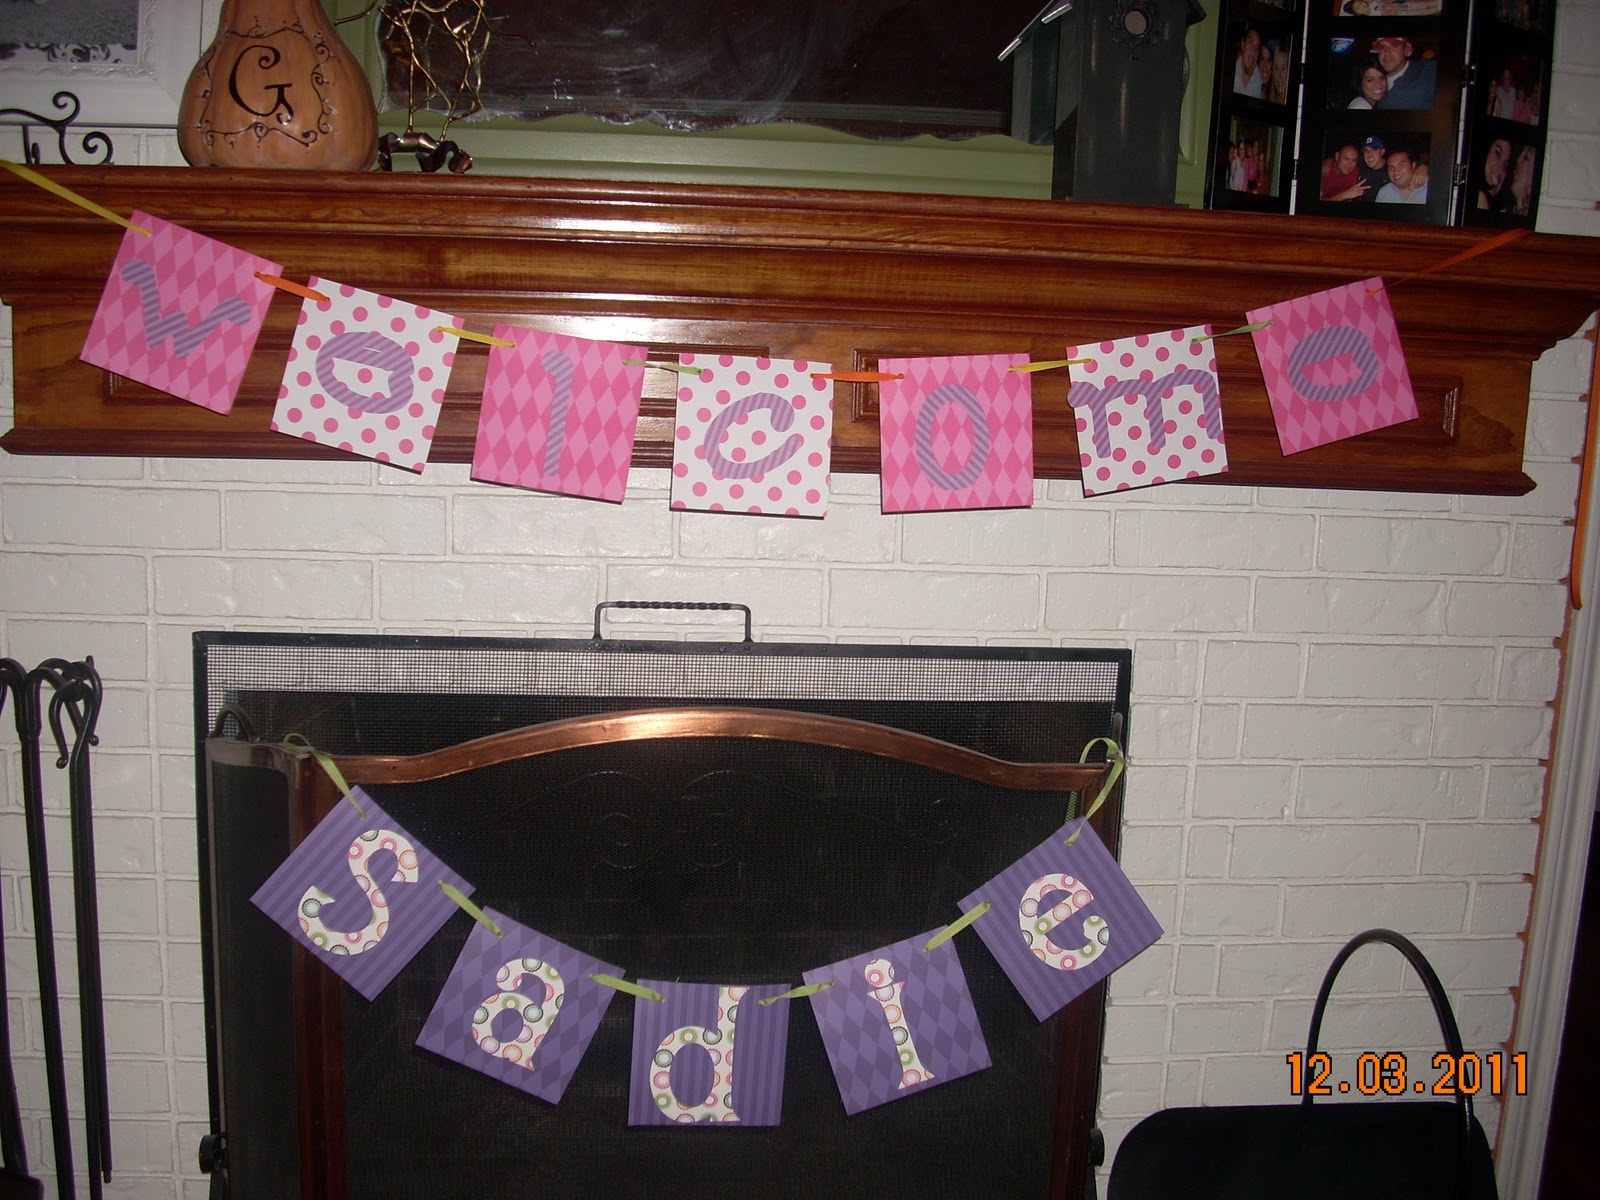
Here are a few more picture from the shower:
Welcome table

 
 My sister-in-law made this adorable decoration.  Love the onesies that spell out the baby's name.  I can only take credit for hanging them up!


Great diaper cake made by my husband's aunt.  Wonderful work, Tia Ana!


Design by Peachy Keen Design